


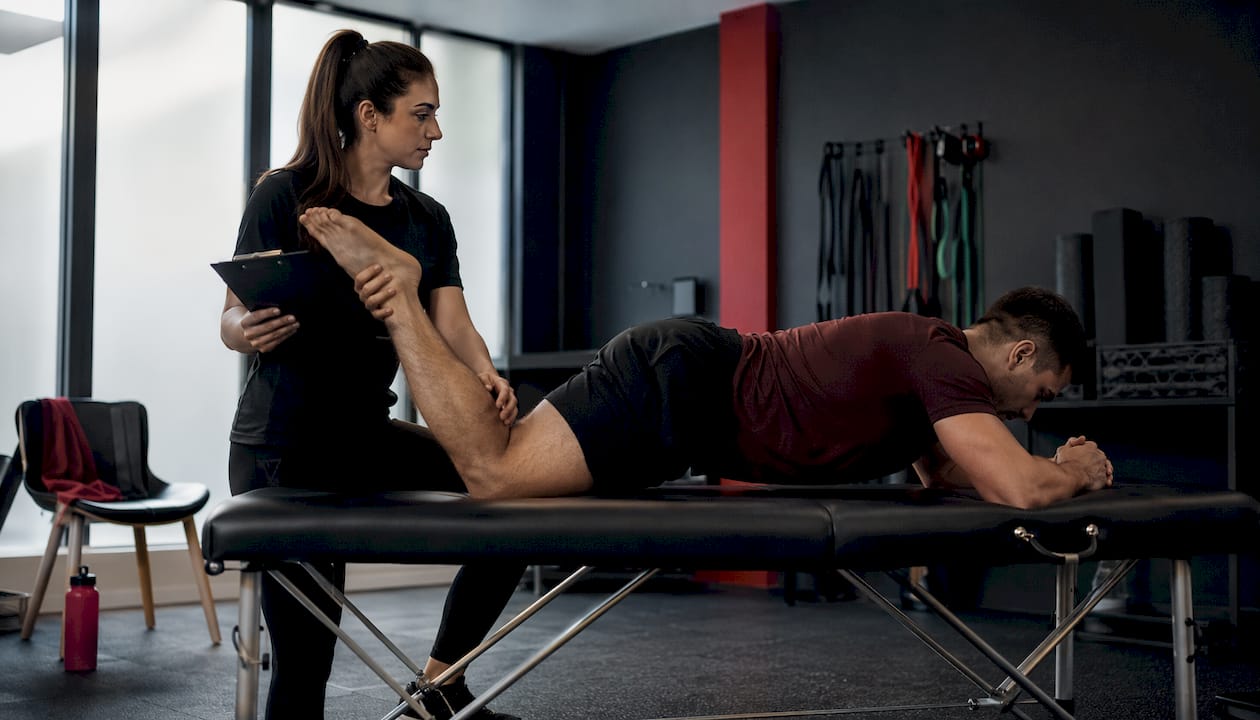
Start controlled, pain-monitored loading within the first 72 hours and follow a phased program that restores range, builds eccentric and concentric strength, and only returns to high-speed running once hamstring strength reaches 85–90% of the uninjured side.
Your first 72-hour checklist:
- Protect the tissue. Avoid aggressive stretching or any activity that spikes pain above 3/10.
- Apply R.I.C.E. Rest, ice (15–20 minutes every 2 hours), compression wrap, and elevation for the first 48–72 hours. Modern guidance favors early controlled loading over prolonged rest once acute swelling settles.
- Monitor pain. Keep all movement at or below 3/10 on a 0–10 pain scale. Pain above that signals you are loading faster than the tissue can handle.
- Begin gentle, controlled movement. Slow walking and pain-free range-of-motion exercises can start within the first day or two for Grade I strains.
- Limit NSAIDs to a short course. Clinical guidance recommends no more than 5–7 days of anti-inflammatory medication; routine corticosteroids are not recommended.
- Arrange follow-up if the injury is severe. Grade II–III strains, inability to weight-bear, or a palpable gap in the muscle need clinician assessment, likely including MRI.
Red flags that need same-day or next-day evaluation: a visible deformity or palpable defect, inability to bear weight, rapidly expanding bruising, or numbness/tingling down the leg. These may indicate a proximal tendon avulsion or other complication requiring imaging and possible surgical referral.
Table of Contents
- What does a full hamstring strain rehab program look like?
- Phase-specific exercises: what to do and how to do it
- Sample week-by-week progressions and return-to-run protocol
- What are the objective criteria for returning to sport?
- When do you need imaging or urgent assessment?
- How do you prevent a hamstring strain from coming back?
- Why does supervised, sport-specific rehab produce better outcomes?
- Key Takeaways
- Recovery takes longer than most people expect, and that is okay
- Bodiesbymahmood can get you back to full speed safely
- Useful sources
What does a full hamstring strain rehab program look like?
Hamstring injury recovery works best when it follows a phased structure tied to what the tissue can actually tolerate, not a fixed calendar. The Mass General nonoperative protocol organizes this into five phases, each with specific goals and objective gates before advancing. Time ranges below are typical starting points; your actual pace depends on pain, strength, and function.

| Phase | Typical Timeline | Primary Goals |
|---|---|---|
| I — Acute/Protection | Weeks 1–2 | Control pain and swelling, protect tissue, begin isometrics and gentle ROM |
| II — Restore ROM & Motor Control | Weeks 2–4 | Full pain-free ROM, glute/core activation, light concentric loading |
| III — Strength | Weeks 3–8 | Progressive concentric and eccentric strengthening, single-leg stability |
| IV — Power & Speed | Weeks 6–12 | Eccentric loading, plyometrics, straight-line running progression |
| V — Return to Sport | Weeks 8–16+ | Sport-specific drills, sprint mechanics, objective RTP criteria met |
Grade I strains often move through Phases I–III in 2–4 weeks. Grade II injuries typically need 6–10 weeks before sport-specific work. Grade III tears, especially proximal avulsions, can require 3–6 months of nonoperative rehab or surgical recovery before return to full activity.
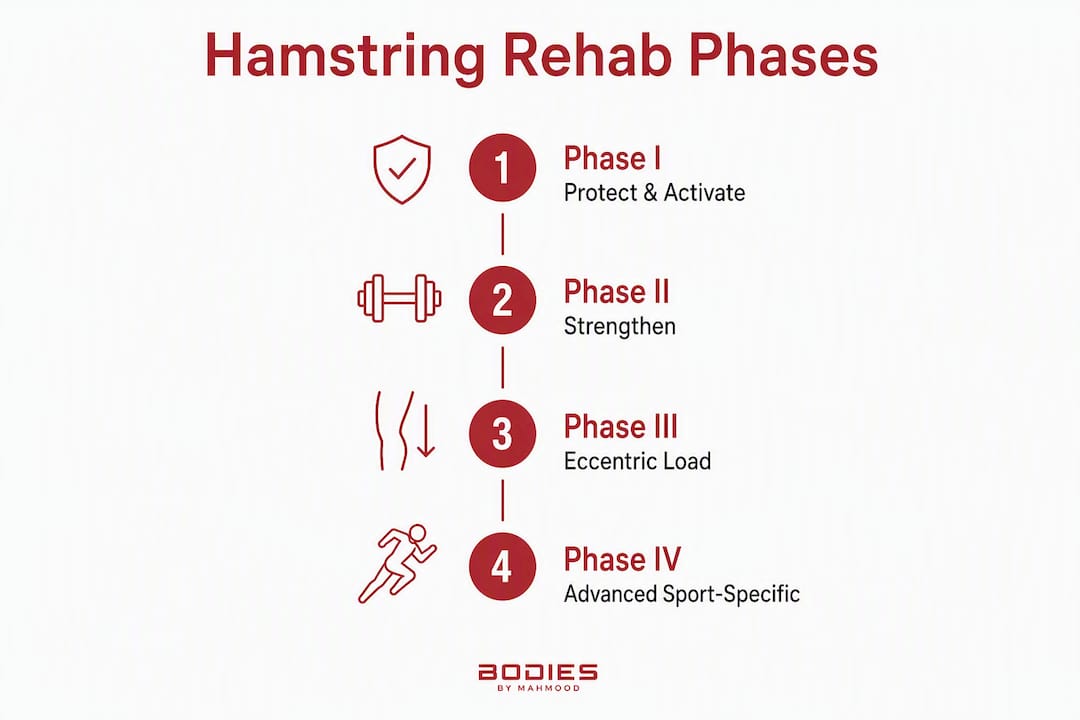
The core progression principle is simple: start with isometric loading, advance to concentric, then shift emphasis to eccentric lengthening work. Lengthening-type exercises produce faster return to sport and lower reinjury rates compared to conventional programs that skip or delay eccentric training. Never advance purely by the calendar. Advance when pain stays below 3/10, when you can complete the current phase’s exercises without compensation, and when strength testing shows you are closing the gap to the uninjured side.
Pro Tip: Write down your pain scores and the exercises you completed each session. A simple training log lets you and your clinician spot stalls early and adjust load before a setback occurs.
Phase-specific exercises: what to do and how to do it
Phase I: protect and activate (weeks 1–2)
The goal here is not to stretch the hamstring aggressively. It is to keep the surrounding system working while the injured fibers begin to heal.
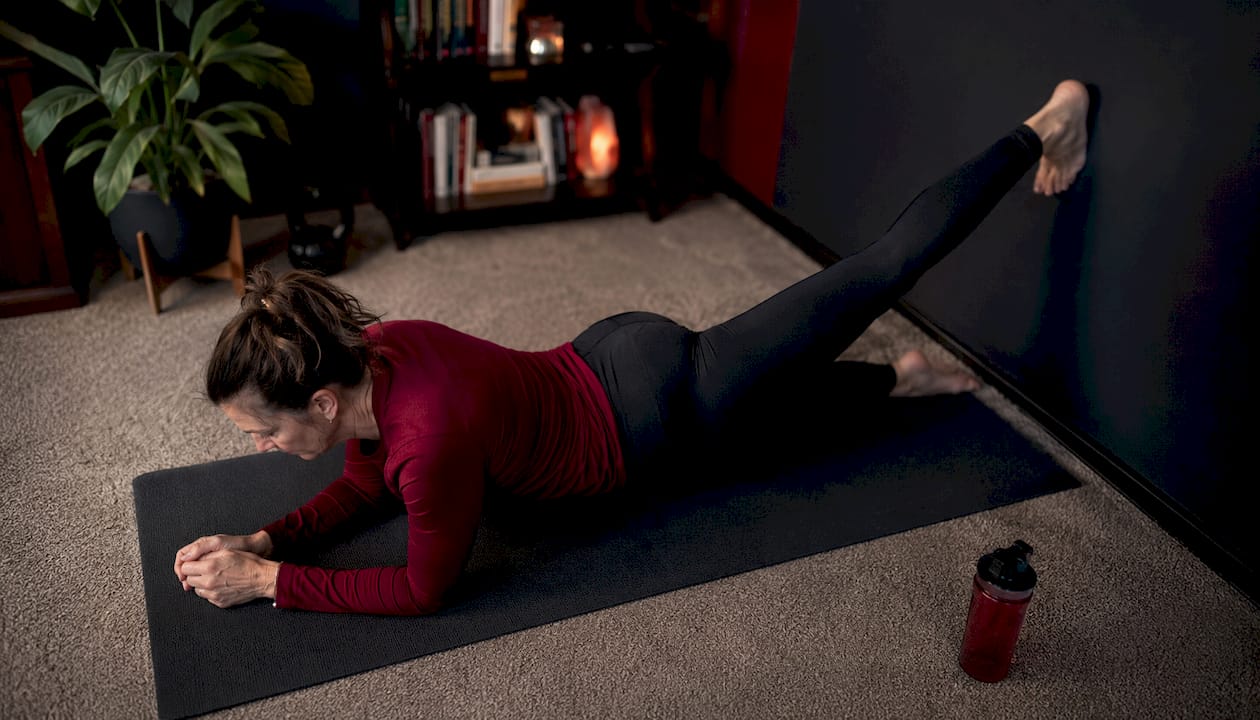
Prone isometric hamstring hold Lie face down. Bend the knee to 30–45 degrees. Press the heel gently into a wall or your clinician’s hand. Hold 5–10 seconds. Aim for 3 sets of 8–10 reps. Pain must stay at or below 3/10. Isometric loading at this stage maintains neuromuscular drive without stressing the healing tissue.
Supine glute bridge (bilateral) Lie on your back, knees bent to 90 degrees, feet flat. Drive through the heels to lift the hips until the body forms a straight line from knees to shoulders. Hold 2 seconds at the top. Lower slowly. 3 sets of 12–15 reps. Keep the core braced and avoid arching the lower back.
Prone hip extension (straight-leg) Lying face down, tighten the glute and lift one straight leg 6–8 inches off the floor. Hold 2 seconds. 3 sets of 10 per side. This activates the glute and proximal hamstring with minimal tissue stress.
Seated calf raises and ankle pumps — simple circulation work that reduces swelling and maintains lower-leg neuromuscular activity.
Phase II: restore range and build concentric strength (weeks 2–4)
- Standing hamstring curl (bodyweight or light resistance band): 3 sets of 12–15 reps, controlled tempo, no swinging.
- Single-leg glute bridge: same setup as bilateral, but one foot elevated. 3 sets of 10 per side. Demand on the hamstring increases significantly.
- Supine hamstring stretch (gentle, not aggressive): lying on your back, loop a strap around the foot and slowly raise the leg to the point of mild tension, not pain. Hold 30 seconds, 3 reps per side. This is one of the better stretches for hamstring strain recovery because it keeps you in control of the load.
- Dead bug (core activation): lying on your back, arms pointing to the ceiling, knees at 90 degrees. Lower one arm and the opposite leg toward the floor without letting the lower back arch. 3 sets of 8 per side.
Phase III–IV: eccentric and advanced loading (weeks 3–12)
Eccentric work is where the real reinjury protection happens. The muscle is under load while lengthening, which is exactly the position where hamstrings tear during sprinting. Eccentric loading builds explosiveness and tissue resilience simultaneously.
- Nordic hamstring curl (graded): kneel on a padded surface with feet anchored. Lower your body toward the floor as slowly as possible using hamstring control. Use your hands to catch yourself. Begin with 3 sets of 3–5 reps, progressing to 3 sets of 8–10 over several weeks.
- Romanian deadlift (single-leg): stand on one leg, hinge at the hip, lower a light dumbbell toward the floor while the free leg extends behind. 3 sets of 8–10 per side. Tempo: 3 seconds down, 1 second up.
- Prone hamstring curl on a stability ball: lying face down with heels on a stability ball, curl the ball toward the glutes. 3 sets of 10–12.
- Lateral band walks and monster walks: glute and hip abductor activation to address the multi-planar demands of sport.
- Deceleration drills: short 10-meter accelerations followed by controlled deceleration. Begin only when straight-line jogging is pain-free.
Pro Tip: Before advancing to Nordic curls or single-leg Romanian deadlifts, confirm that glute activation is solid. If the lower back takes over during a single-leg bridge, the hamstring is compensating for a weak glute. Fix the glute first.
| Exercise | Phase | Primary Target | Sample Dose |
|---|---|---|---|
| Prone isometric hold | I | Hamstring (isometric) | 3×10 reps, 5–10 sec hold |
| Bilateral glute bridge | I–II | Glute, proximal hamstring | 3×15 reps |
| Single-leg glute bridge | II–III | Glute, hamstring stability | 3×10 per side |
| Standing hamstring curl | II–III | Hamstring (concentric) | 3×12–15 reps |
| Nordic hamstring curl | III–IV | Hamstring (eccentric) | 3×5–10 reps |
| Single-leg Romanian deadlift | III–IV | Hamstring, glute (eccentric) | 3×8–10 per side |
| Deceleration drills | IV–V | Sport-specific neuromuscular | 6–10 reps, 10–20 m |
Sample week-by-week progressions and return-to-run protocol
Concrete weekly templates help you stay on track without guessing. These are starting frameworks. Adjust based on your pain scores, strength testing, and clinician feedback.
Grade I strain (mild, 2–4 weeks)
- Week 1: R.I.C.E., isometrics, bilateral bridges, gentle ROM. Walk normally as pain allows.
- Week 2: Add single-leg bridges, standing curls, light stretching. Begin short walks at a brisk pace.
- Week 3: Introduce Romanian deadlifts (bilateral), progress to single-leg work. Begin walk/jog intervals if pain is 0/10 during brisk walking.
- Week 4: Nordic curls (graded), deceleration drills, straight-line jogging at 50–60% effort. Confirm strength symmetry approaching 85% before progressing to faster running.
Grade II strain (moderate, 6–10 weeks)
- Weeks 1–2: Protected loading only. Isometrics, bilateral bridges, pool walking if available.
- Weeks 3–4: Single-leg bridges, concentric curls, light hip hinge work. No running.
- Weeks 5–6: Romanian deadlifts, introduce Nordic curls at low volume. Brisk walking, then walk/jog intervals.
- Weeks 7–8: Progressive Nordic loading, lateral drills, straight-line jogging at 60–70% effort.
- Weeks 9–10: Sport-specific movement prep, deceleration drills, progressive tempo runs. Strength testing before advancing to sprinting.
Grade III strain (severe, 12–20+ weeks, nonoperative)
The Mass General protocol places Phase I at weeks 0–2, with criteria-based advancement through five phases. Weeks 1–4 focus on protection and isometric work. Weeks 4–8 shift to concentric loading. Eccentric work typically begins weeks 6–10. Running progression starts no earlier than weeks 8–12, and only when strength symmetry exceeds 80% on testing.
Graded return-to-run protocol
This sequence applies across all grades, starting only when walking is fully pain-free:
- Brisk walking (20–30 minutes, 0/10 pain)
- Walk/jog intervals: 1 minute jog, 2 minutes walk, repeated 6–8 times
- Continuous jogging at 50% effort for 10–15 minutes
- Progressive tempo runs: increase to 70–80% effort over 2–3 sessions
- Straight-line running at 90% effort with monitored sprint mechanics
- Full sprinting and sport-specific cutting, only after objective RTP criteria are met
| Week Range | Grade I | Grade II | Grade III |
|---|---|---|---|
| 1–2 | Isometrics, ROM, walking | Protected isometrics, pool walking | Strict protection, isometrics only |
| 3–4 | Concentric loading, walk/jog | Single-leg bridges, concentric curls | Gentle concentric, no running |
| 5–6 | Nordic curls, jogging | Romanian deadlifts, walk/jog | Single-leg work, concentric loading |
| 7–8 | Sport drills, tempo runs | Nordic curls, jogging | Eccentric intro, walk/jog |
| 9–12 | Return to sport (criteria met) | Sport-specific drills, tempo | Progressive running, eccentric loading |
| 12–20+ | Maintenance program | Return to sport (criteria met) | Return to sport (criteria met) |
What are the objective criteria for returning to sport?
Feeling better is not the same as being ready. A common clinical error is treating “pain-free” as “fully healed.” Strength testing routinely reveals deficits that persist well after pain resolves, and failing to close a strength gap of 10–15% or more is directly associated with high reinjury risk.
Gating criteria before initiating high-speed running and plyometrics:
- Hamstring limb symmetry index (LSI) of 85–90% or greater on isometric or isokinetic testing
- Pain at or below 3/10 during all loaded exercises and functional movements
- Full, pain-free range of motion equal to the uninjured side
- Single-leg hop test battery: single hop, triple hop, crossover hop, and 6-meter timed hop, all within 85–90% of the uninjured limb
- No visible compensation (hip drop, trunk lean) during single-leg squat or Romanian deadlift
- Sprint mechanics check: no guarding, no asymmetrical arm swing, no shortened stride on the injured side
- Psychological readiness: the athlete feels confident accelerating and changing direction without bracing for pain
When isokinetic dynamometry is not available (it often is not outside clinical settings), hand-held dynamometry and field-based hop tests are practical alternatives. The Mass General protocol uses an LSI threshold of greater than 80% to begin plyometrics and greater than 85–90% to clear for sprinting and return to sport.
Strength symmetry is the most objective single marker of readiness. Functional tests like the hop battery and sprint mechanics screening add the sport-specific layer that strength numbers alone cannot capture.
When do you need imaging or urgent assessment?
Most hamstring strains respond well to conservative care. But certain signs mean you need a clinician the same day, not next week.
Seek urgent assessment if you notice:
- Inability to bear weight or walk normally within the first 24 hours
- A visible deformity, palpable gap, or sudden “pop” followed by immediate severe weakness
- Rapidly expanding bruising or hematoma, especially in the posterior thigh
- Progressive numbness, tingling, or weakness in the lower leg (possible nerve involvement)
- Pain that is uncontrolled with rest and basic analgesia
- Swelling that is disproportionate to the apparent injury, particularly with calf tenderness (rule out deep vein thrombosis)
MRI is the preferred imaging for suspected Grade II–III tears, proximal tendon avulsions, and cases where the clinical picture is unclear. Ultrasound can be useful for acute assessment of muscle belly tears. Surgery is reserved for complete tendon tears, proximal avulsions with significant retraction, and cases where conservative management has clearly failed. Most partial tears heal with physical therapy alone.
Grade I injuries that are not improving after 2–3 weeks of appropriate rehab also warrant reassessment. The diagnosis may need revisiting.
How do you prevent a hamstring strain from coming back?
Reinjury is the biggest risk in hamstring recovery. The injury that happens six weeks after returning to sport is almost always worse than the original. Maintenance programming is not optional.
What to keep doing after returning to sport:
- Eccentric loading twice per week: Nordic curls or single-leg Romanian deadlifts at maintenance volume (2–3 sets of 6–8 reps). This is the single most evidence-supported habit for reducing reinjury risk.
- Dynamic warm-up before every session: leg swings, hip circles, walking lunges, A-skips, and B-skips. A static stretch before explosive activity does not prepare the hamstring for high-speed loading.
- Progressive sprint exposure: never jump from moderate-intensity training to maximal sprinting without a build-up session. Workload spikes are a primary driver of reinjury.
- Glute and core maintenance: 2 sessions per week of single-leg stability work and anti-rotation core exercises to maintain lumbopelvic control.
- Mobility work: regular supine hamstring stretching and hip flexor work after training, not before. A practical mobility restoration checklist can help you track flexibility targets over time.
Pro Tip: Schedule eccentric loading on a specific day of your training week, not as an afterthought. Athletes who treat it as optional drop it when training gets busy, which is exactly when reinjury risk rises.
Why does supervised, sport-specific rehab produce better outcomes?
Individualized, multi-planar rehab reduces reinjury and shortens return-to-sport timelines compared to isolated hamstring work done without clinical oversight. The reason is not complicated: a clinician can see what you cannot feel. Compensation patterns, asymmetrical loading, and premature progression all look fine from the inside and obvious from the outside.
The practical value of supervised rehab comes from three things: objective testing at regular intervals (baseline hand-held dynamometry, re-tested every 2–3 weeks), load management that adjusts weekly volume based on tissue response, and sprint mechanics coaching that catches guarding patterns before they become permanent compensations.
Consider a college soccer midfielder with a Grade II proximal hamstring strain. A generic program might have her jogging at week 4 because pain is low. A supervised program would test her hamstring LSI at week 4, find it lower than the target threshold, and hold her at concentric loading for another couple of weeks before introducing running. She returns to full training once strength symmetry meets criteria, and does not get reinjured by returning prematurely. Psychological readiness is the piece most programs skip. Fear of reinjury changes sprint mechanics, reduces acceleration, and creates the very guarding pattern that increases injury risk. Supervised progressive exposure, with objective feedback showing the athlete their strength numbers improving, is the most effective way to rebuild confidence alongside tissue capacity.
Pro Tip: When transitioning from clinic to field, use video of your sprint mechanics as objective feedback. Watching yourself run removes the subjective “it feels fine” bias and gives you and your coach a shared reference point.
Key Takeaways
A phased, criteria-based hamstring strain rehab program that prioritizes early loading, progressive eccentric strength, and objective return-to-sport testing gives you the best chance of a full recovery without reinjury.
| Point | Details |
|---|---|
| Start loading early | Begin pain-monitored isometrics and gentle movement within 72 hours; prolonged rest slows recovery. |
| Follow phase-based progression | Advance by criteria (pain, strength, function), not by the calendar alone. |
| Hit strength symmetry targets | Reach 85–90% hamstring LSI before returning to high-speed running or sprinting. |
| Watch for red flags | Inability to weight-bear, palpable defect, or neurological signs need same-day clinical assessment. |
| Bodiesbymahmood for supervised rehab | Bodiesbymahmood’s sport-specific rehab and personal training programs in Orlando provide objective testing, phased loading, and return-to-run coaching. |
Recovery takes longer than most people expect, and that is okay
The hardest part of hamstring injury recovery is not the exercises. It is the patience. Grade II and III strains routinely take 8–16 weeks of structured work before an athlete is genuinely ready to sprint again, and that timeline is not a failure. It reflects how long it actually takes for muscle tissue to remodel and for strength symmetry to close.
What I see most often is athletes who feel good at week 4 or 5 and interpret that as clearance. Pain-free does not mean healed. Strength testing at that point almost always shows a deficit of 20–30% compared to the uninjured side. Returning to sprinting with that gap is how a 6-week injury becomes a 6-month one.
The grade and location of the injury matter enormously. A distal Grade I strain in a recreational runner and a proximal Grade III avulsion in a collegiate sprinter are not the same problem, and they do not follow the same timeline. Individualized assessment changes the plan in ways a generic protocol cannot anticipate.
If you are working through this on your own, use the objective markers in this guide as your checkpoints. If you are stalling, getting stronger but not closing the symmetry gap, or feeling anxious about returning to speed, that is exactly when supervised assessment adds the most value.
Bodiesbymahmood can get you back to full speed safely
Recovering from a hamstring strain on your own is possible for mild injuries. But if you want objective testing, a plan that adjusts to your actual strength numbers, and coaching that covers sprint mechanics and sport-specific movement, that is where Bodiesbymahmood delivers something a generic program cannot.

At Bodiesbymahmood in Orlando, the sports rehab and personal training programs are built around the same phased, criteria-based approach outlined in this guide. Your first appointment includes a baseline strength assessment, a review of your injury grade and history, and a personalized plan that maps your progression from protected loading through return to full sport. Trainers with over 25 years of experience in college and professional sports backgrounds manage your load week by week, re-test your strength every 2–3 weeks, and clear you for running and sprinting based on objective numbers, not how you feel on a given day. View the full range of sports rehab services and book your assessment to get started.
Useful sources
- Hamstring strain rehabilitation (PMC9569141) — Peer-reviewed clinical review covering pain-monitoring thresholds, strength symmetry targets (85–90% LSI), and objective return-to-sport criteria. Primary source for RTP metrics throughout this guide.
- Contemporary approaches to soft tissue injury management (PMC12489226) — Supports the early controlled loading principle over prolonged immobilization; basis for the acute-phase guidance in this article.
- Hamstring injury — StatPearls (NCBI Bookshelf) — Comprehensive clinical reference covering diagnosis, grading, treatment options (including NSAID duration limits), and evidence for eccentric/lengthening exercise protocols.
- Rehabilitation Protocol for Hamstring Injury Non-op — Mass General — The five-phase nonoperative protocol used as the structural backbone for phase timelines, progression gates, and LSI thresholds in this guide.
- Hamstring injury — Mayo Clinic — Patient-facing clinical guidance on acute care, physical therapy, and surgical indications for complete tears and avulsions.
- Hamstring injury — NHS — Public-facing guidance on PRICE therapy, gradual mobilization, and when to seek physiotherapy; supports acute-phase self-care recommendations.
- Hamstring injury — Cleveland Clinic — Covers injury grading, recovery timelines by grade, and triage guidance for when specialist referral is appropriate.
This article is general information, not medical advice. Confirm your specific diagnosis, imaging needs, and rehab plan with a licensed clinician or sports medicine professional before beginning any exercise program.